การติดตั้งและกำหนดค่า Active Directory Windows Server 2016,2019,2022
Published on March 1, 2023
การติดตั้งและกำหนดค่า Active Directory Windows Server 2016,2019,2022
Active Directory เป็นบริการ Directory Service ของ Microsoft Windows Server ที่ใช้สำหรับจัดการและบริหารจัดการระบบเครือข่ายภายในองค์กร โดยการใช้ Active Directory จะช่วยให้ผู้ใช้งานสามารถเข้าถึงทรัพยากรต่าง ๆ บนเครือข่ายได้อย่างง่ายดายและปลอดภัย รวมถึงสามารถจัดการสิทธิ์การเข้าถึงและการใช้งานของผู้ใช้งานในระบบได้ด้วย
Active Directory จะเก็บข้อมูลของทรัพยากรต่าง ๆ บนเครือข่าย เช่น ผู้ใช้งาน, กลุ่มผู้ใช้งาน, คอมพิวเตอร์, เครื่องพิมพ์, และอุปกรณ์เครือข่ายอื่น ๆ โดยเป็นการเก็บข้อมูลแบบชั้นต่ำสุด (Lowest Level), ซึ่งทำให้ผู้ใช้งานสามารถเข้าถึงข้อมูลที่ต้องการได้อย่างรวดเร็วและง่ายดาย และสามารถจัดการและตรวจสอบสิทธิ์การเข้าถึงข้อมูลได้ตามที่ได้กำหนดไว้ก่อนหน้านี้ นอกจากนี้ Active Directory ยังมีฟังก์ชั่นการสนับสนุนในการจัดการความปลอดภัยเครือข่ายและการจัดการการเชื่อมต่อเครือข่ายอีกด้วย
นี่เป็นคำแนะนำสำหรับการติดตั้ง Active Directory โดยใช้ Server Manger หากต้องการติดตั้ง Active Directory บน Server แบบ GUI ซึ่งปัจจุบัน การติดตั้ง Active Directory ใน Microsoft Windows Server ลักษณะติดตั้งที่เหมือนกันทุกประการ ท่านสามารถทำตามได้เลย ง่าย เร็ว
ข้อกำหนดเบื้องต้น
ก่อนเริ่มต้น ขอแนะนำให้เปลี่ยนชื่อเซิร์ฟเวอร์และตั้งค่า IP แบบ Fix IP ก่อนการติดตั้ง หลังจากติดตั้ง Active Directory อาจทำให้ปวดหัวได้
1. เปิดตัวจัดการเซิร์ฟเวอร์ Server Manager เลือก “Add Roles and Features”
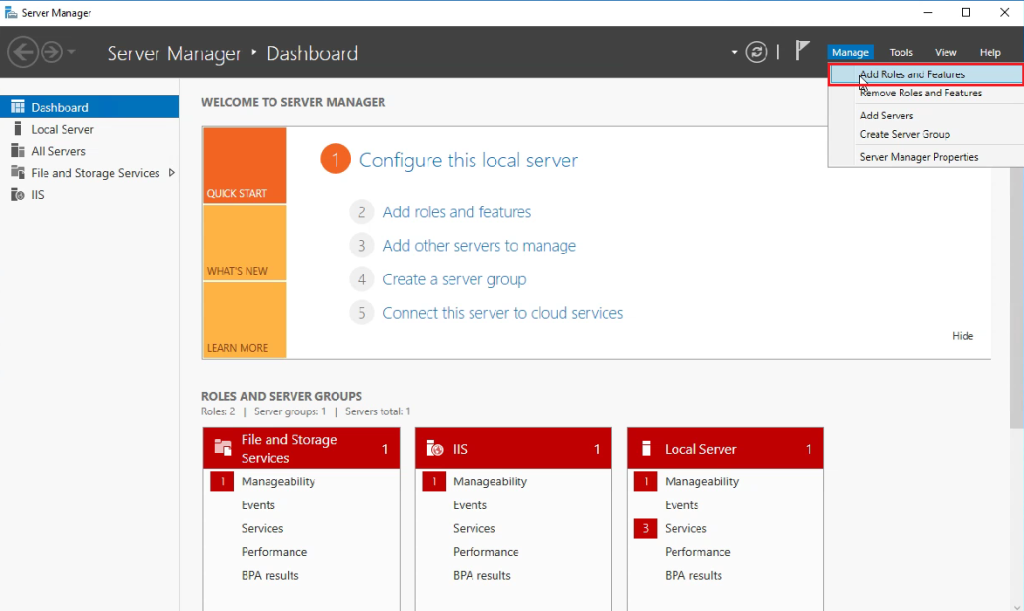
รูปที่ 1
2. Before you begin คลิก Next
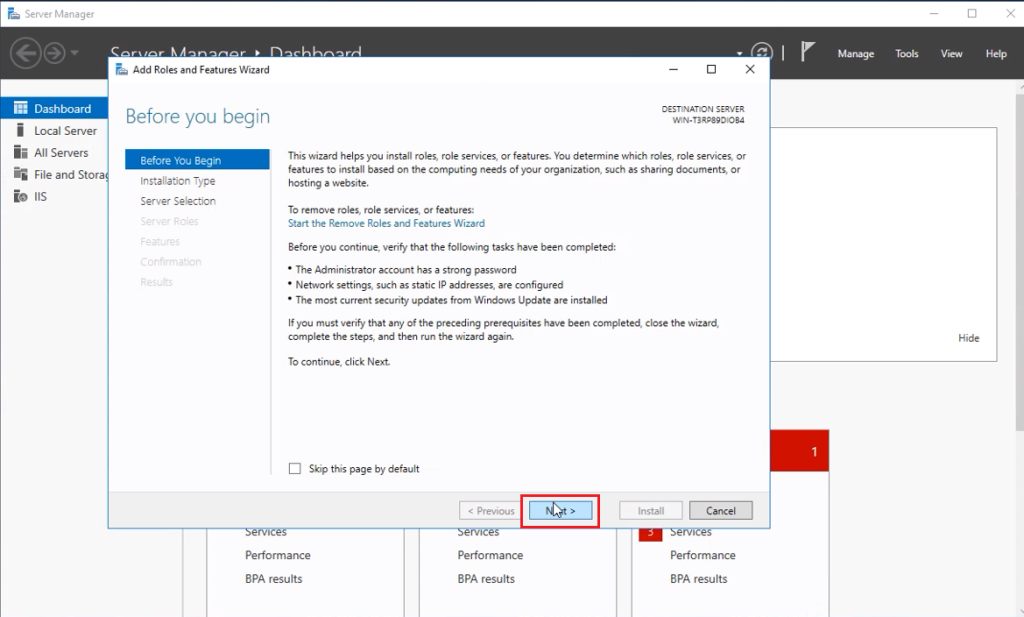
รูปที่ 2
3. Select installation type คลิก Next
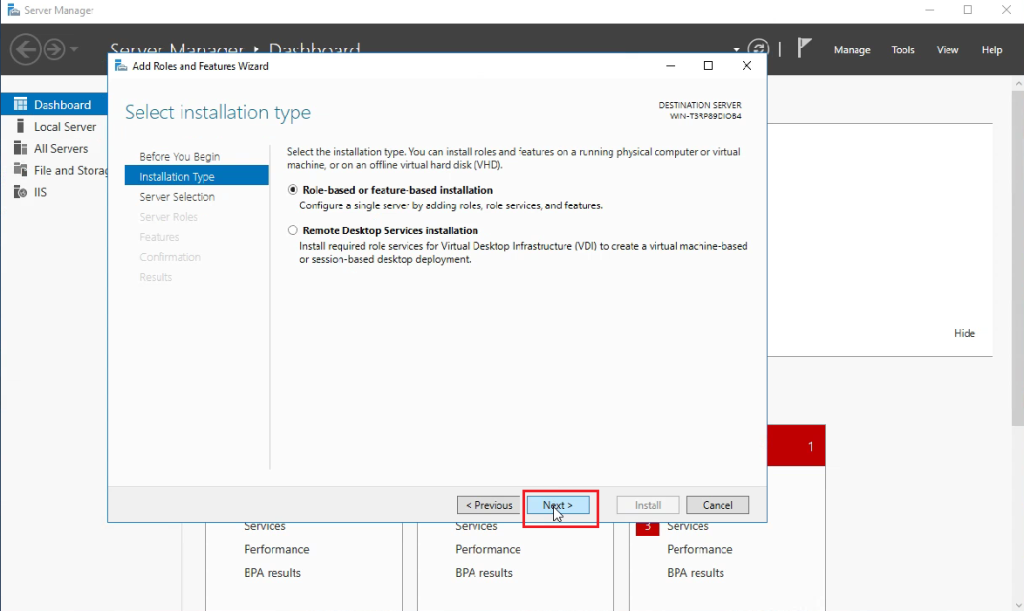
รูปที่ 3
4. Select destination server คลิก Next
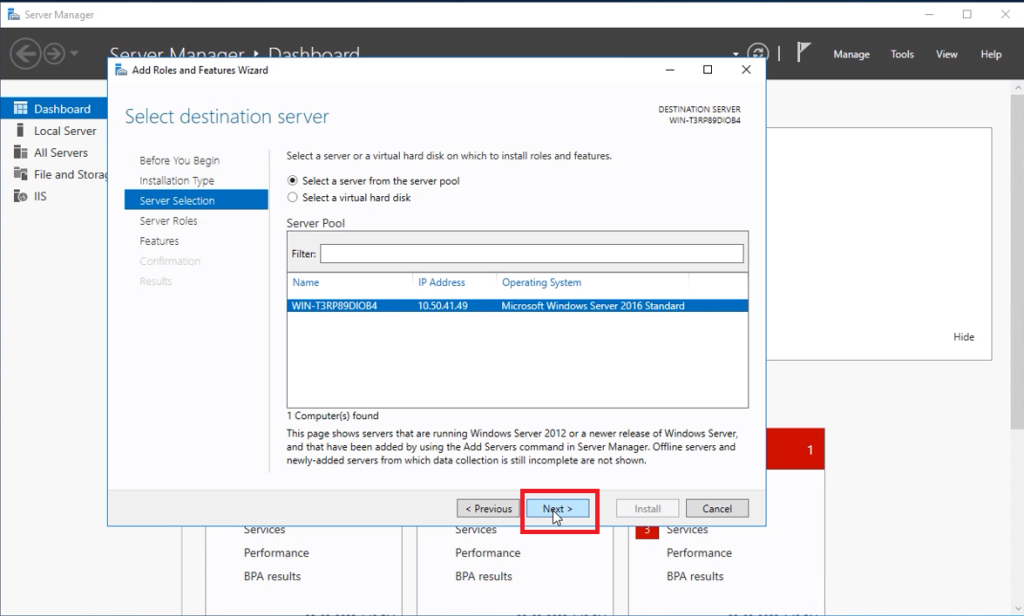
รูปที่ 4
5. เลือก Active Directory Domain Services คลิก Next
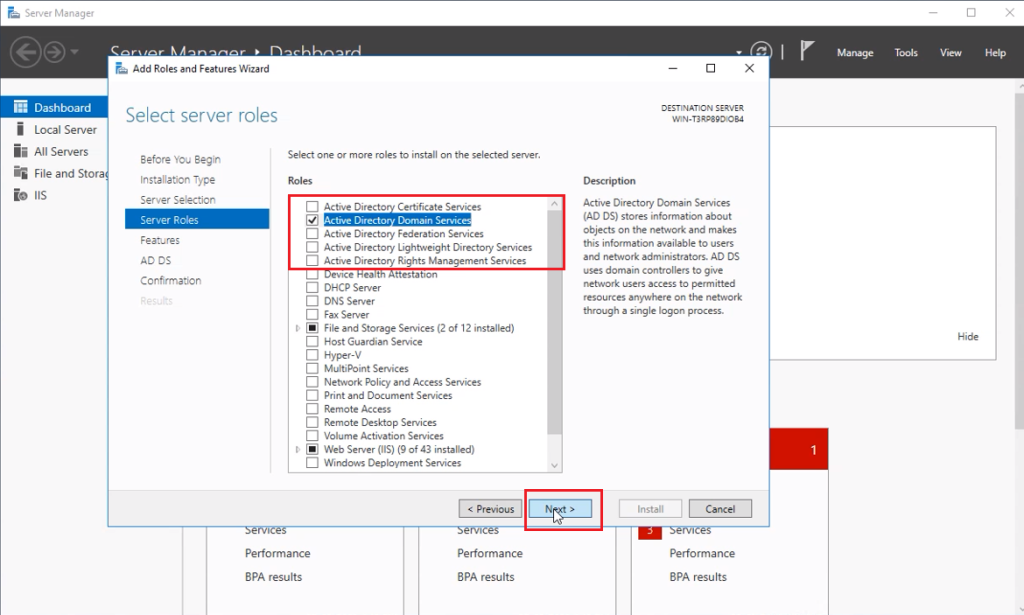
รูปที่ 5
6. เลือก Add Features คลิก Add Features
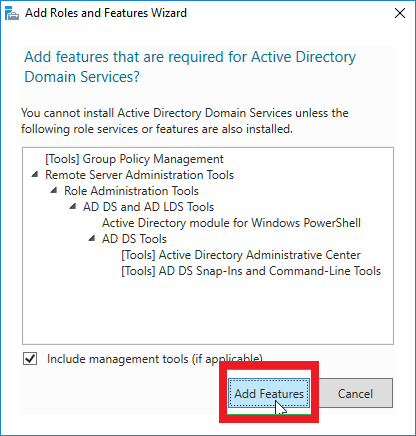
รูปที่ 6
7. เลือก Select features คลิก Next
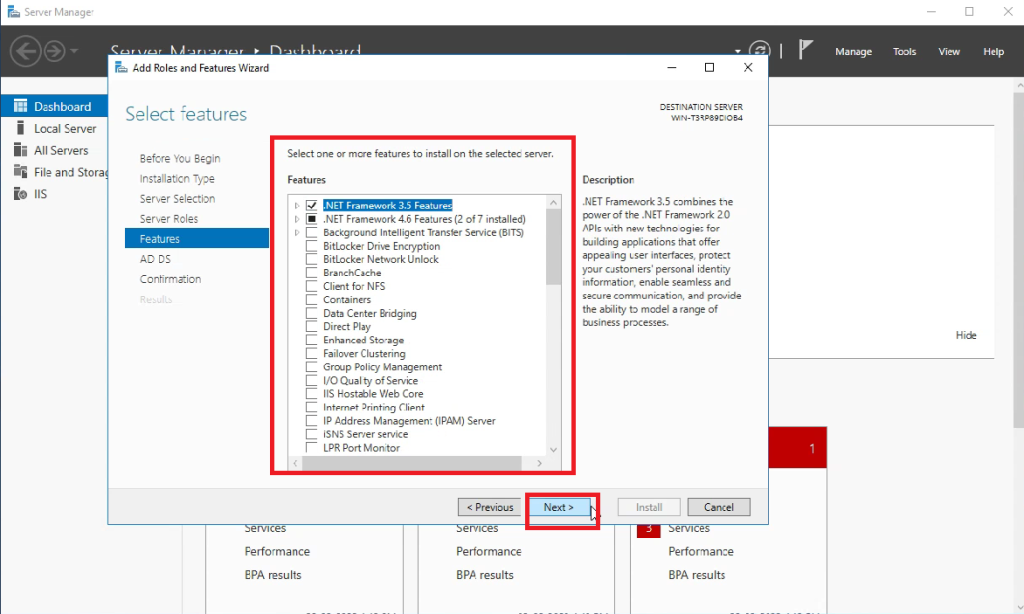
รูปที่ 7
8. เลือก Active Directory Domain Services คลิก Next
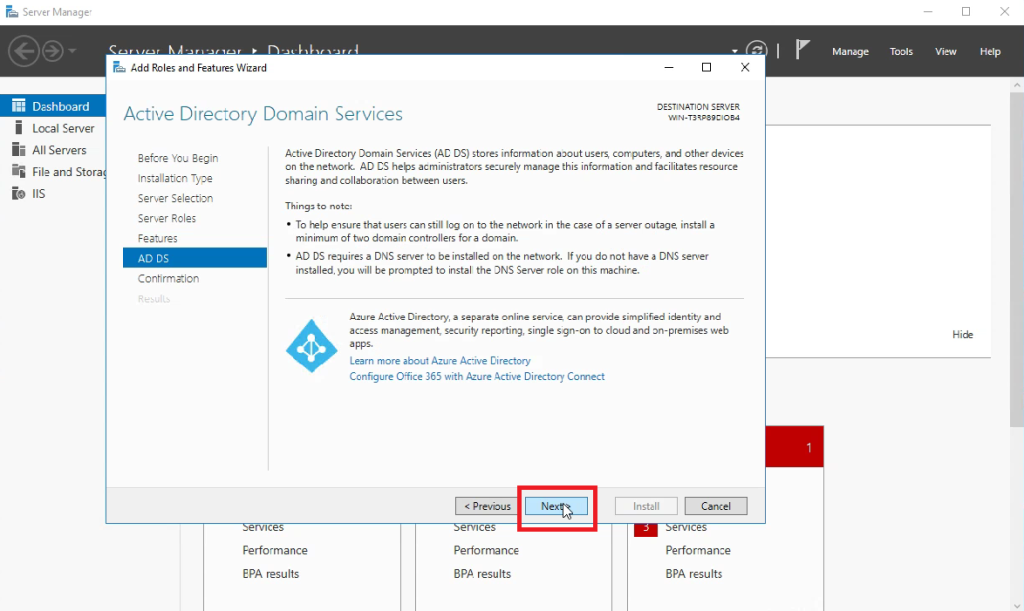
รูปที่ 8
9. เลือก Confirm installation selections คลิก Next
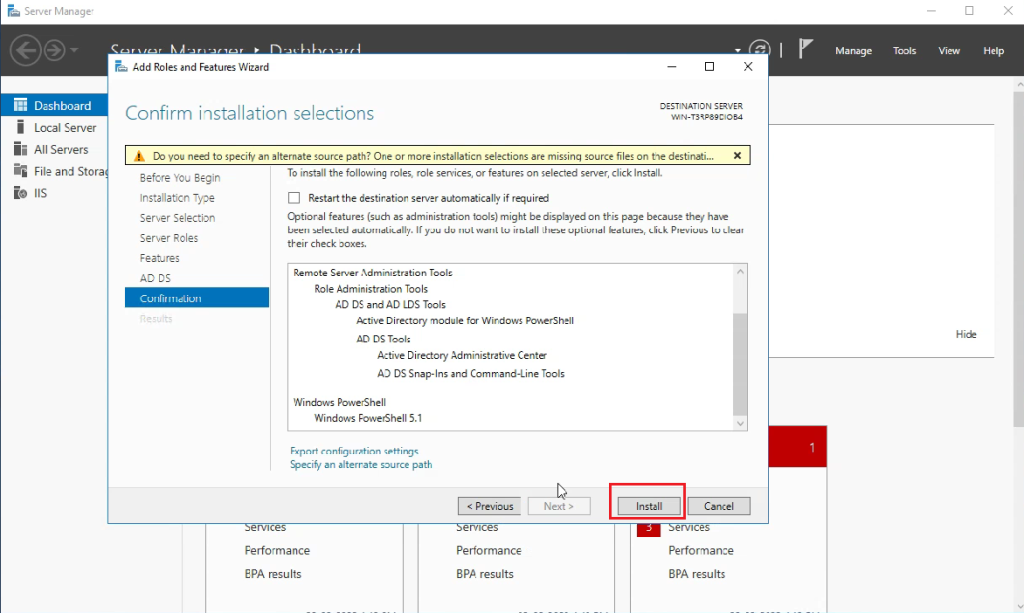
รูปที่ 9
10. รอให้การติดตั้งเสร็จสิ้น
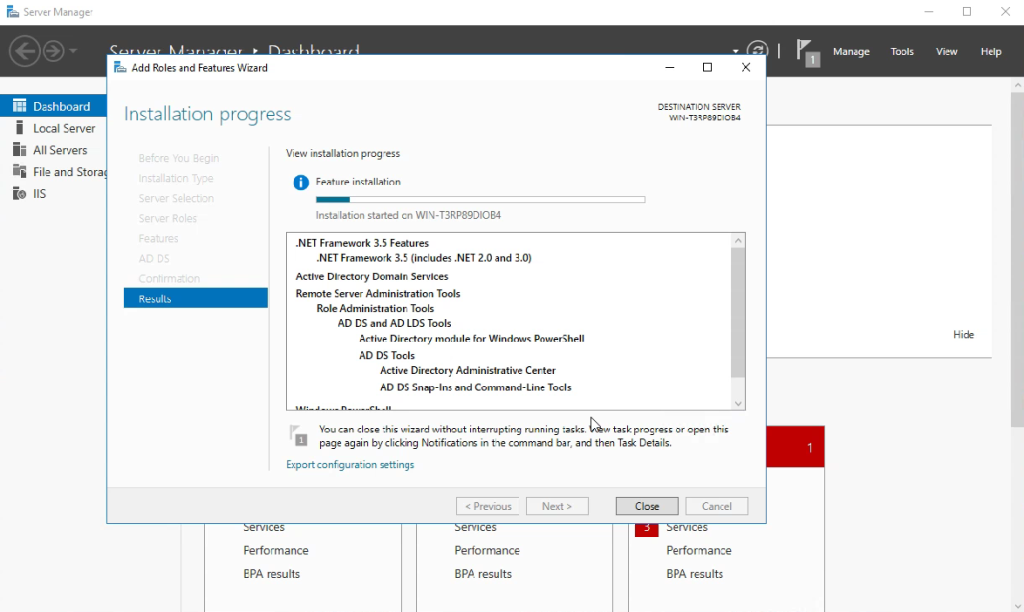
รูปที่ 10
11. เมื่อติดตั้ง Active Directory เสร็จสิ้น ให้คลิก “Promote this server to a domain controller”
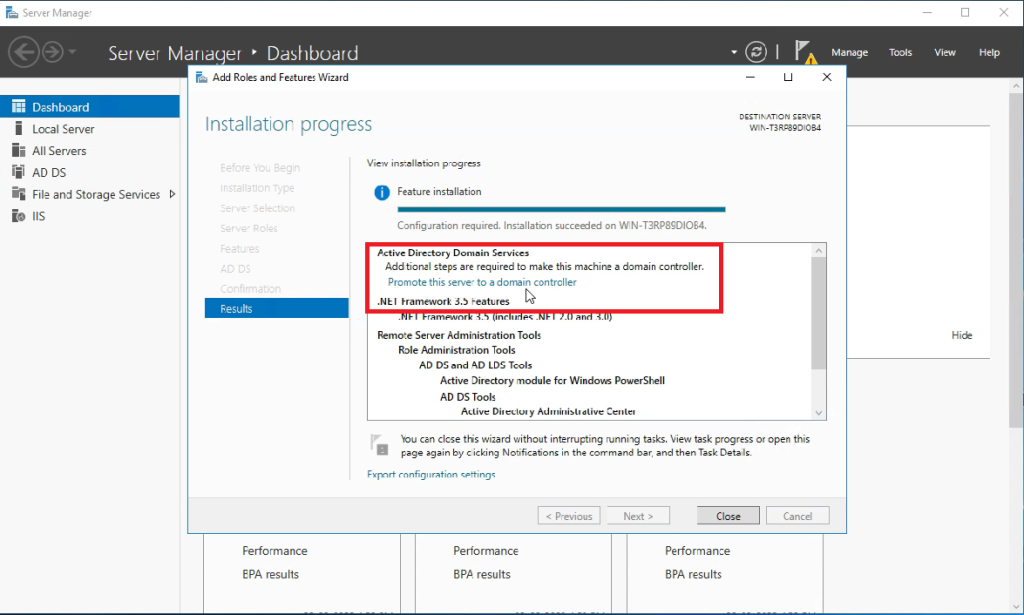
รูปที่ 11
12. กำหนด Domain Active Directory เพียงเลือก Add a new forest แล้วใส่ Domain name ที่ต้องการ เช่น YAMKOKO.LOCAL คลิก Next
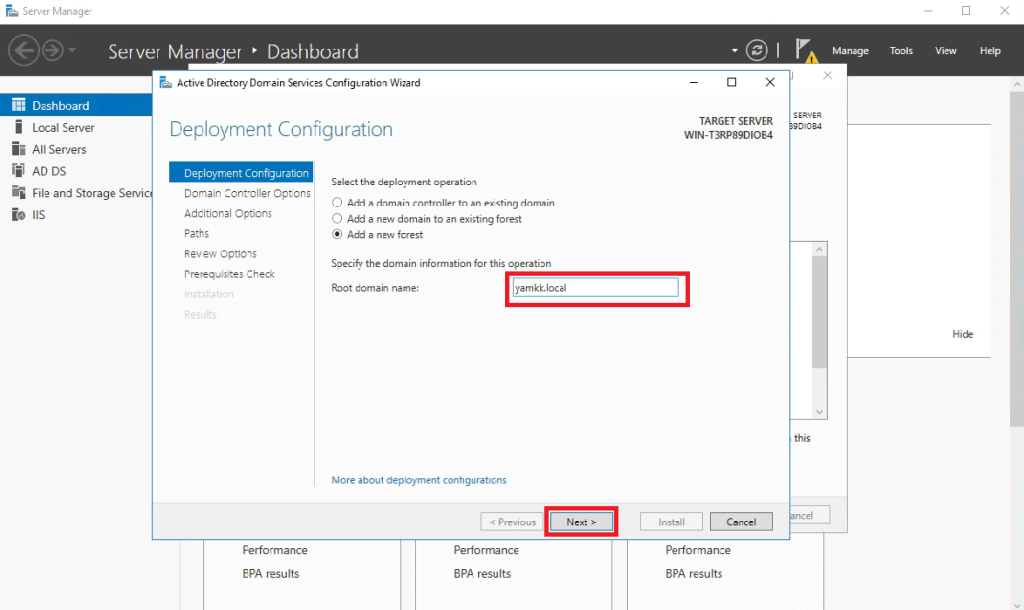
รูปที่ 12
13. กำหนด Password สำหรับ DSRM คลิก Next
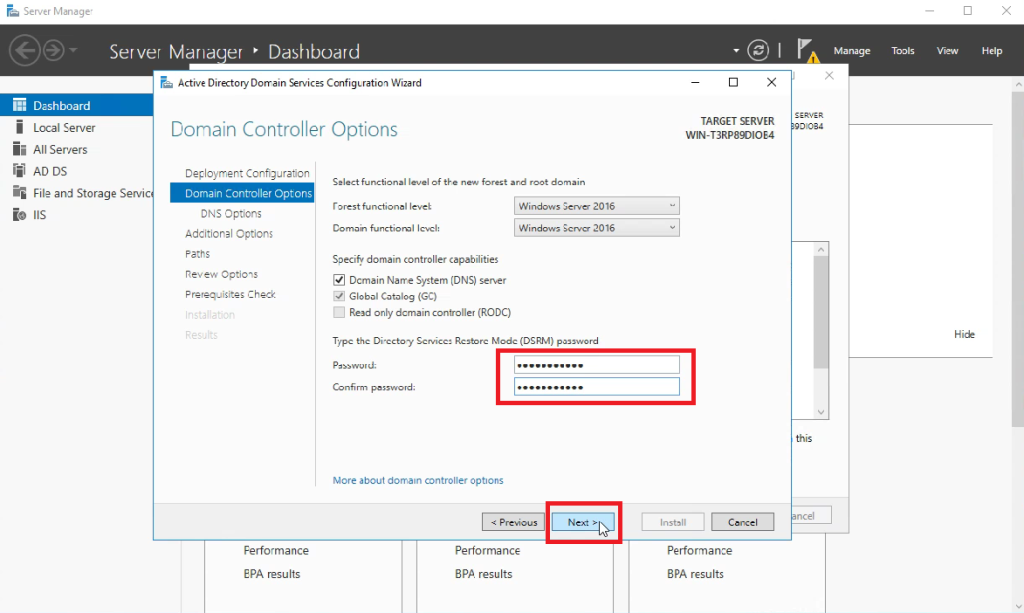
รูปที่ 13
14. DNS Options คลิก Next
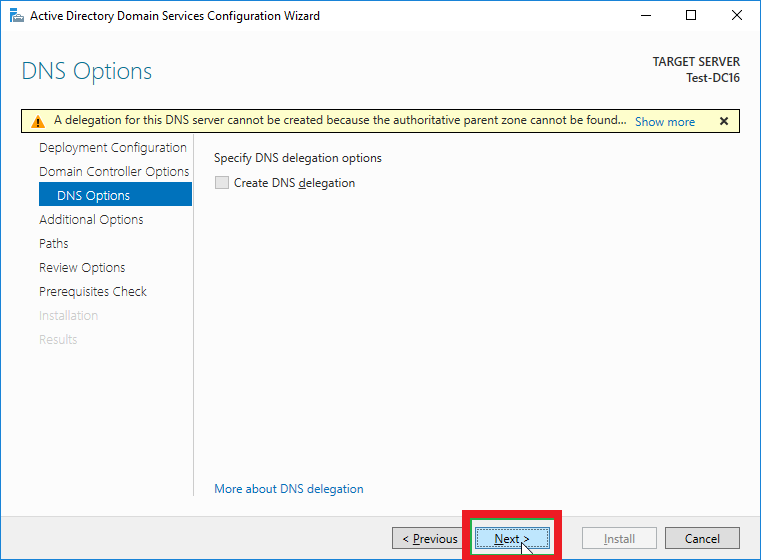
รูปที่ 14
15. Additional Options คลิก Next
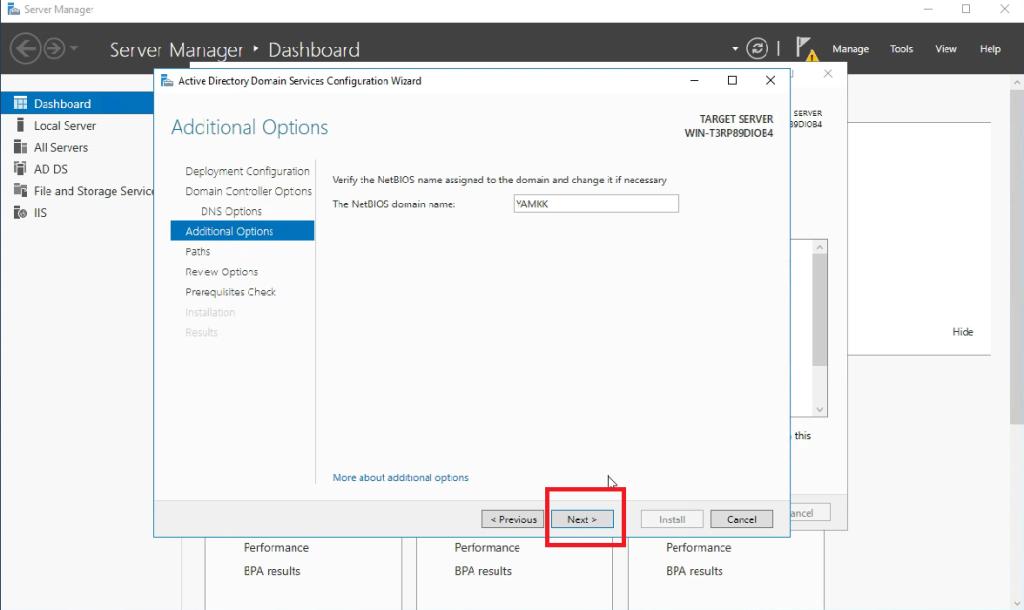
รูปที่ 15
16. Paths คลิก Next
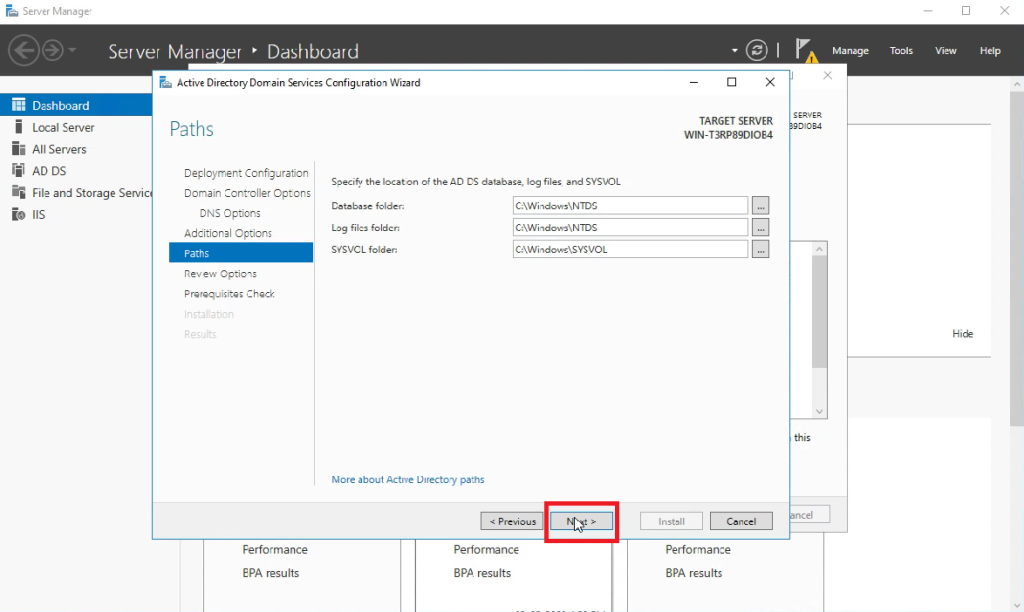
รูปที่ 16
17. Review Options คลิก Next
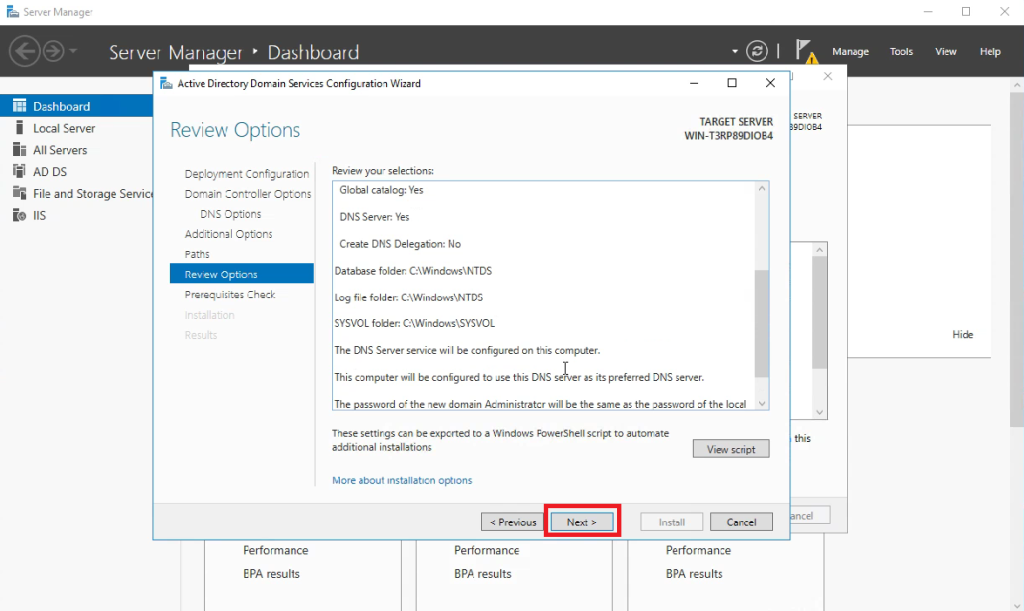
รูปที่ 17
18. Prerequisites Check คลิก Next
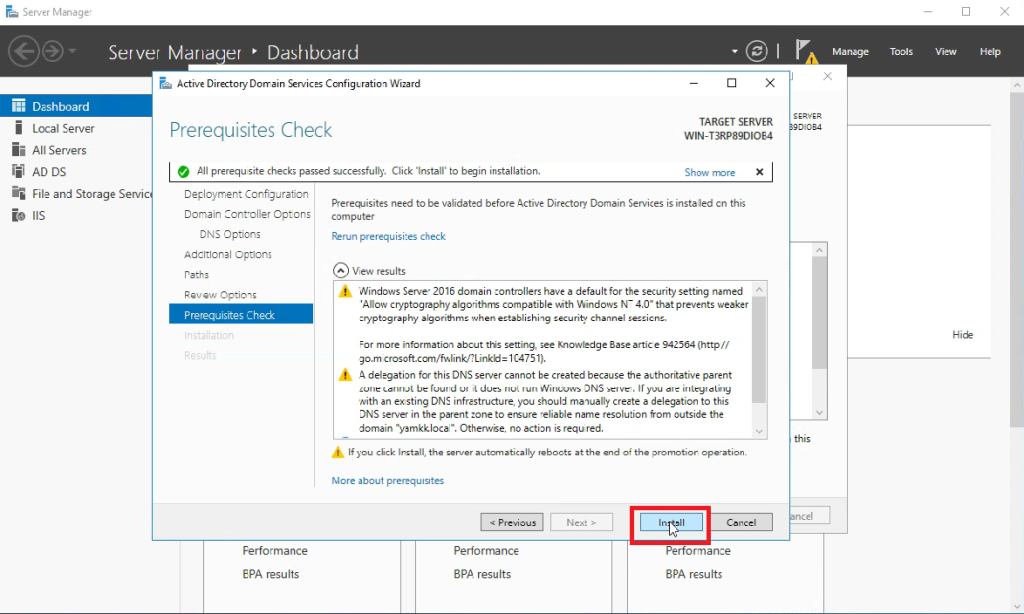
รูปที่ 18
19. รอให้การติดตั้งเสร็จสิ้น
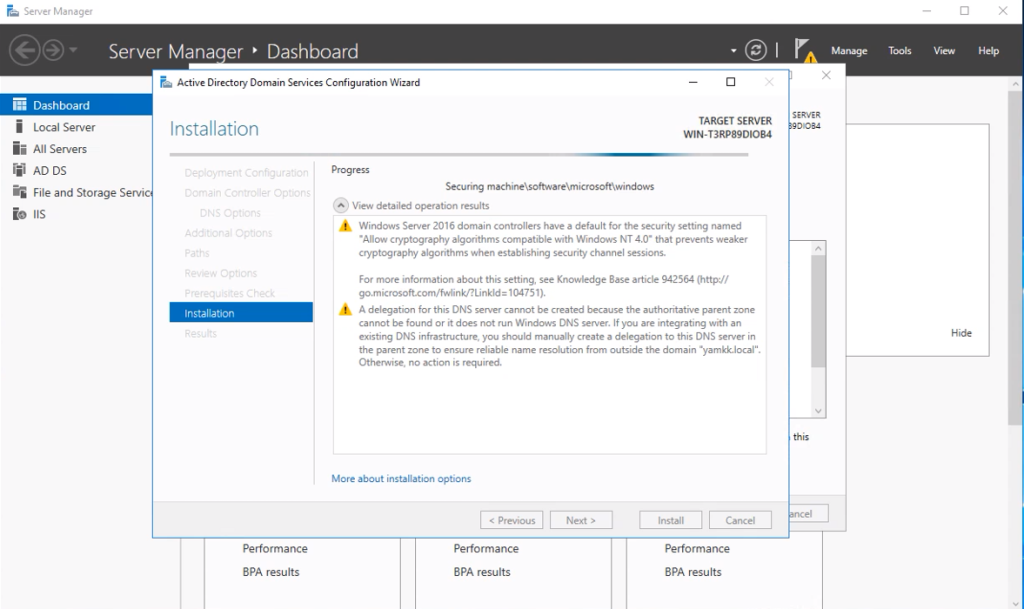
รูปที่ 19
20. เมื่อติดตั้งเสร็จสิ้น ให้ทำการ Signed Out หรือ Restart ได้เลย
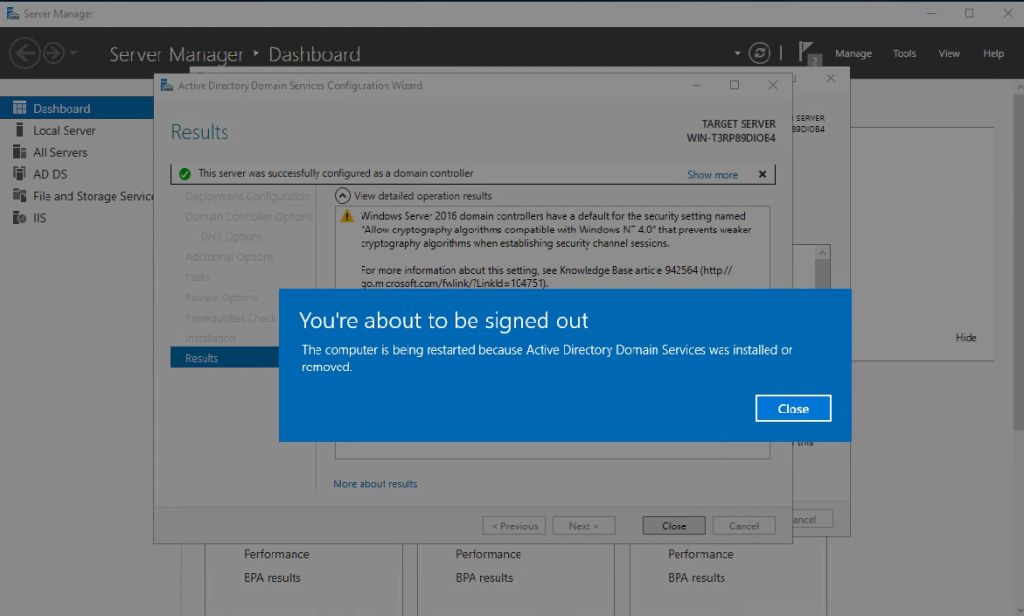
รูปที่ 20
21. Active Directory และ DNS ได้รับการติดตั้งแล้ว ให้ทำการเช็คดูเครื่องมือให้ครบถ้วน ว่าได้รับการติดตั้งแล้วเสร็จหรือไม่ โดยไปที่ Server Manger > Dashboard
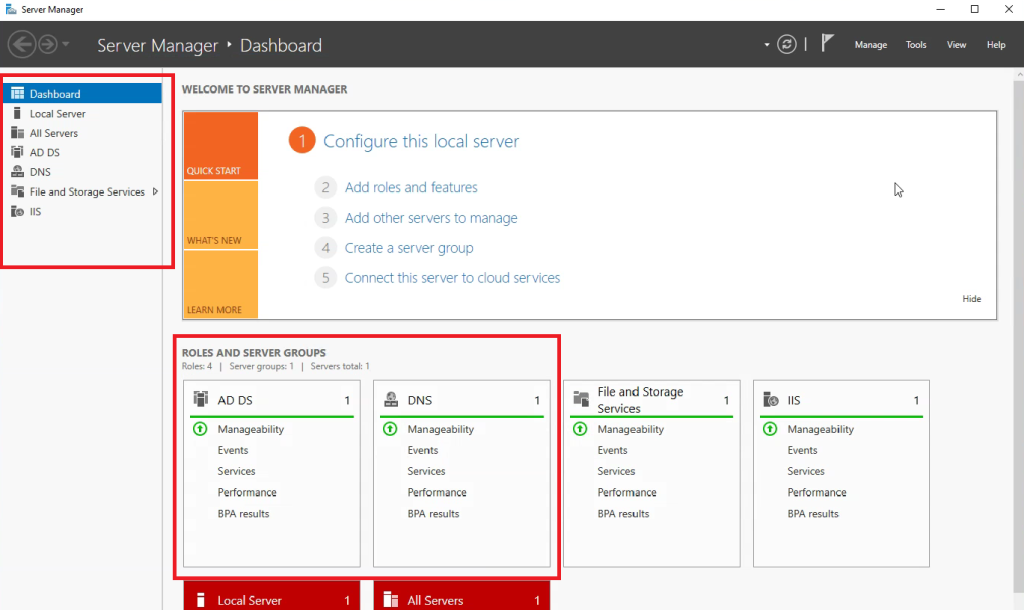
รูปที่ 21
21. หรือ Server Manger > Dashboard> Menu> Tools> Active Directory Users and Computers
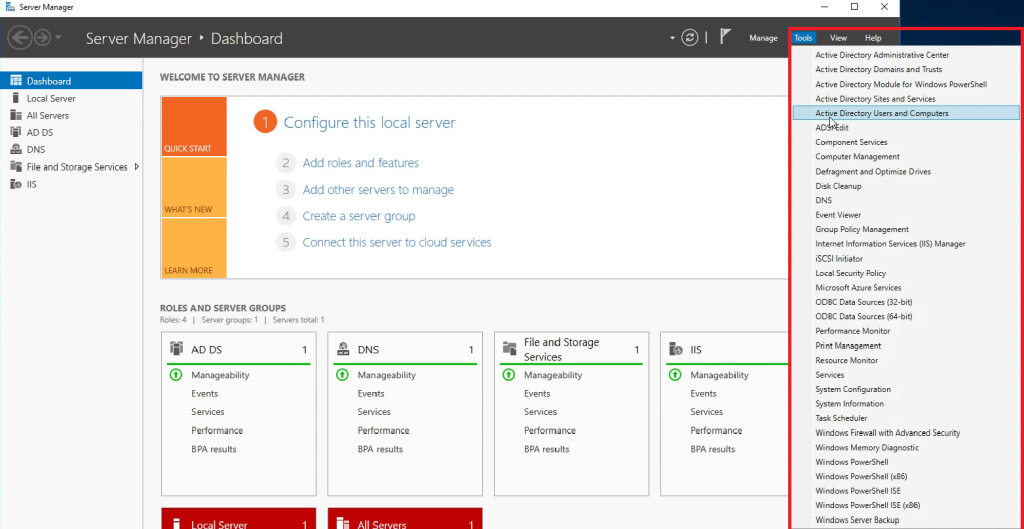
รูปที่ 22
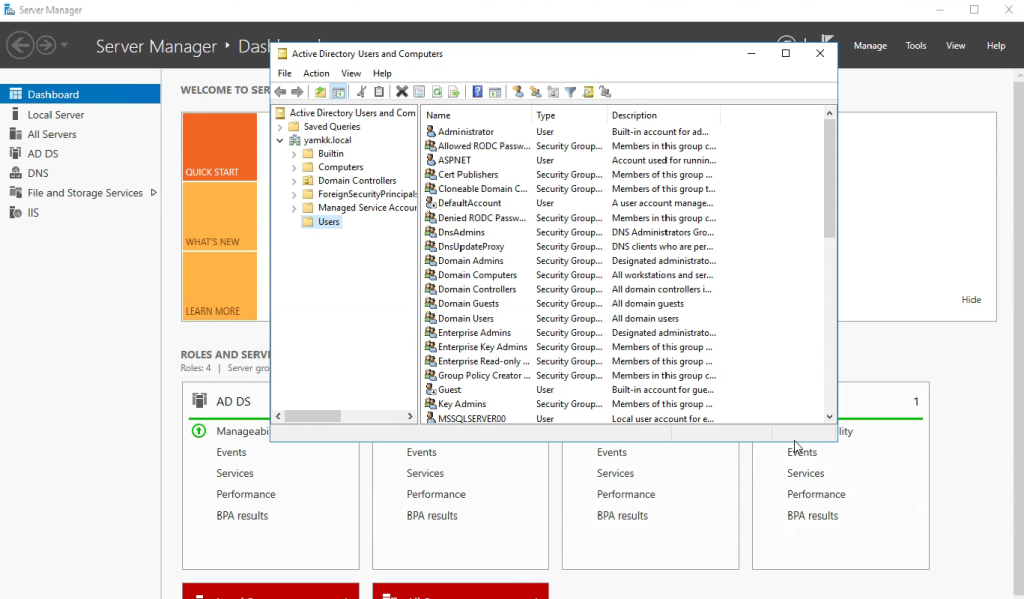
รูปที่ 23
ก็เป็นอันเสร็จสิ้น สำหรับการติดตั้ง Active Directory บน Windows Server 2016
แล้วพบกับ บทความใหม่ๆ จาก AVESTA ได้ในอนาคต
AVESTA CO., LTD. ให้บริการเขียนซอฟต์แวร์ ติดตั้ง รับเป็นที่ปรึกษา รวมถึงระบบสำรองข้อมูล ด้วยประสบการณ์ยาวนานนับสิบปี

Introduction to Data Leak Prevention

Proxmox Ecosystem
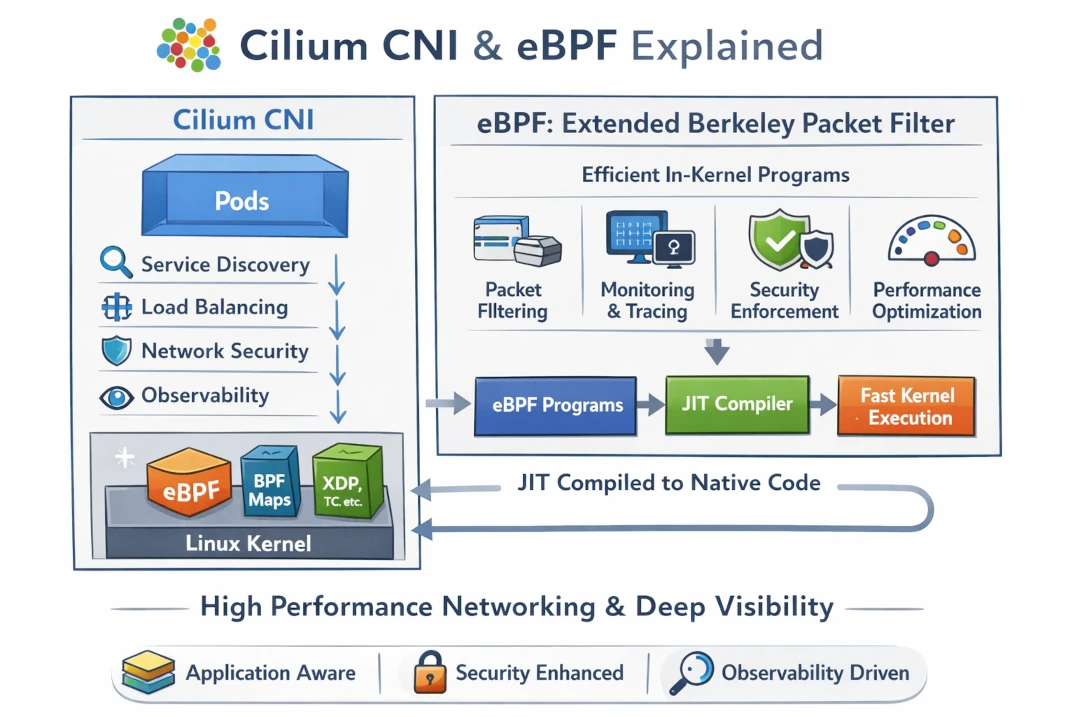
Introduction to Cilium CNI

KubeVirt vs VMware

แนะนำให้รู้จักกับ Scale Computing